Chocolate Coated Easter Marshmallows

- Serves: 18 shapes
- Prep Time: 00:30
- Cooking Time: 00:00
- * Plus setting and freezer time
There's no need to miss out on Easter traditions when healthy marshmallow bunnies and chickens can be made with additive free ingredients and coated in homemade or dairy-free organic chocolate. This recipe is vanilla flavoured, see my Pink Marshmallow recipe to make both colours.
Ingredients
* Please click on the green icon next to the ingredients listed below for extra details and helpful information.
- 1 cup/250ml filtered water, divided
- 1/2 cup maple syrup (100%)
- 1/4 cup honey (unprocessed), light in colour is best
- 1 1/2 tsp vanilla extract (organic)
- 1/4 tsp pink Himalayan salt, or sea salt
- 3 Tbsp (20ml Aust. tablespoon) gelatin (grass-fed), unflavoured for setting
- arrowroot flour, for dusting cookie cutters
- Homemade chocolate or 300g dark chocolate, for coating marshmallow shapes (see recipe link below)
Directions
Note: you will need Easter cookie cutters to cut out your marshmallow shapes.
Line a large 33 x 22cm rectangle baking tin with baking paper, you want the marshmallow no higher than 1.5 - 2 cm, or lower than the sides of your cookie cutters. (Add a little oil to the base and sides to help the paper stick to the tin).
Add 1/2 cup of filtered water, maple syrup and honey to a small saucepan. Heat on medium until the mixture is pipping hot, remove just before it starts to bubble (approx. 4 mins), then add the vanilla and salt, stir to dissolve the salt.
Add the second 1/2 cup of filtered water to a large glass or stainless steel mixing bowl with high sides. Sprinkle the gelatin over the water and allow to bloom (it will soften and swell within 2 - 3 minutes). If you are also making pink shapes, see Pink Marshmallow recipe for colour and flavour additions.
Beat the firm gelatin mixture on low using a hand-held electric beater or a stand mixer for 3 - 4 seconds to break up the mixture (I use a hand-held electric beater). Pour in approximately 2 tablespoons of the heated sweet mixture and continue beating to dissolve the gelatin. Start pouring in the remaining heated mixture, roughly 1 tablespoon at a time while you beat on medium, have all the sweet mixture beaten in within approximately 2 minutes.
Increase speed to high and beat for 7 - 8 minutes until the marshmallow is thick and fluffy, you should be able to see ripples on the surface made by the beaters.
Pour without delay into the lined tin, as it sets quickly. Place into the fridge uncovered for at least 60 minutes to set firm (but can be left longer or even overnight).
Use the baking paper to remove the slab of marshmallow from the tin and place it on a large chopping board. Add a little arrowroot flour to a saucer and use a pastry brush to dust the inside and outside of the cookie shapes with arrowroot (this needs to be done before each cut to prevent sticking). Place cut shapes onto a lined cookie tray. Place the tray into the freezer for 30 - 40 minutes before coating with chocolate or the shapes can be left in the fridge until you are ready to coat them the next day but don't skip the freezer step before coating in chocolate (the heat of the chocolate can melt the marshmallow a little).
Make my homemade Chocolate recipe leaving out the nuts, seeds and berries or you can melt organic dark chocolate in a double saucepan (the marshmallow can thicken the chocolate, I find it easier to only do a few at a time and start again with fresh chocolate). Have a second tray lined ready to place the coated shapes on.
Pour some homemade chocolate mixture from the blender into a small bowl (recipe here) or melted dark chocolate. Remove one shape from the freezer and use 2 forks to assist in turning the marshmallow over to coat. Sit the flat base of the marshmallow on a fork to allow excess chocolate to drip off, then place on the lined tray (don't allow to sit too long in the warm chocolate). Remove the next shape from the freezer and repeat. Use a clean bowl to add more chocolate when needed and continue to coat as above. Place the tray in the fridge or freezer to set the chocolate. (At the end I remelt the left-over thicken chocolate and add the offcuts from the marshmallow shapes with nuts to make chocolate clusters or rocky road).
Store in an airtight container in the fridge for up to 1 week, if making ahead they can be frozen.
It's nice to make a mix of chocolate-coated and plain marshmallow shapes, I've also made a variety of white and pink colours this Easter (Pink Marshmallows recipe). The shapes that aren't chocolate-coated will need to be coated in a little arrowroot flour to keep them dry.
You may also like


filtered water
I feel it's much better for our health if we filter our water. Our tap water contains disinfectants, chlorine and chloramine. Also floride is add which I believe is toxin to our bodies.
maple syrup (100%)
Maple syrup is an earthy, sweet tasting amber liquid that is produced by boiling down the sap of maple trees. Use organic 100% maple syrup which is a natural food sweetener, not a flavoured maple syrup. Pure maple syrup contains a decent amount of some minerals, especially manganese and zinc, some traces of potassium and calcium but it does contain a whole bunch of sugar. I try to reduced the amount of sweetness in each recipe to the lowest possible without compromising taste. Feel free to adjust to your liking. I use maple syrup in place of raw honey when I don't want the strong honey flavour coming through in a recipe. I have paleo cookies and desserts in my cookbook made from whole food ingredients with natural sugars but please don’t overindulge. Use as a treat only for special occasions.
honey (unprocessed)
Use unrefined or raw honey. It is the most common natural sweetener in my recipes. It's best to buy local unprocessed honey as it has wonderful health benefits and can help with allergies. Generally honey sold in supermarkets has been processed. Honey possesses antiseptic and antibacterial properties.
vanilla extract (organic)
Use an organic vanilla extract (not an essence) or vanilla powder. Vanilla makes a big difference to the flavour of a recipe, I recommend keeping to the quantities I have stated in a recipe. I prefer Madagascar pure vanilla extract manufactured by ‘Simply Organic’ and for powder, Vanillamax 100% pure, finely ground Madagascar vanilla beans produced by Bulletproof.
pink Himalayan salt
Raw pink Himalayan salt crystals is unlike common table salt which can be a highly refined industrial byproduct, otherwise know as sodium chloride. Himalayan salt is completely pure and may naturally balance the body's alkaline/acidity and regulate water content. In addition Himalayan salt helps in the absorption of nutrients from food and contains many trace minerals for healthy cell structure. I purchase fine pink Himalayan crystal salt so I can use it in my shaker and for cooking.
gelatin (grass-fed)
Ensure you use unflavoured grass-fed gelatin in my recipes. ‘Great Lakes’ is a good brand, it's made from Kosher grass-fed beef. When using gelatin to thicken desserts, use the Great Lakes red carton. The green carton (which is cold water-soluble and does not thicken) I use to add to smoothies and drinks for extra protein. Another brand I like is Zint which I purchase online from iherb. Gelatin is pure collagen protein, which is good for bone and joint care. It is also excellent for skin, hair and nails (helps the wrinkles from the inside).
arrowroot flour
Arrowroot is a herb, the roots are cultivated for its starch properties. It is used in my recipes as a thickener and I also like combining it with almond meal to produce a much lighter texture, more like a gluten flour. I find the starch helps to bind the ingredients together. You can substitute tapioca flour, which is made from the dried roots of the cassava plant. Tapioca can be used in baking, it has a slightly sweet flavour. However, I do not recommend thickening with tapioca, as it has a stretchy, gummy texture. Supermarkets only sell in very small containers, which is not cost effective. Purchase from baking specialty stores, health food stores or online. ( When substituting for cornflour in recipes, 2 teaspoons arrowroot = 1 tablespoon cornflour/starch).
dark chocolate
In some of my recipes I have used Paleo approved dark chocolate drops/chips, they are dairy, soy, and gluten-free (my favourite brands are, 'Absolute Organic' or 'Chef's Choice' certified organic 70% cacao, purchase online or from health food stores). I also used 70 - 85% organic dark chocolate blocks, they can be broken into pieces or melted for recipe. I also make my own chocolate from: cacao butter or coconut oil, raw cacao powder and sweetened with 100% maple syrup, pinch of sea salt and vanilla extract.

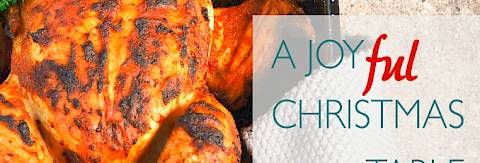
I've battled with Chronic Fatty Liver Disease, an Autoimmune Thyroid Disease (Hashimoto's), Arthritis and digestive issues for many years. I decided to conduct my own research on what food choices could help my conditions. These choices culminate under what is termed a Paleo Lifestyle. I live in Perth, Western Australia, with my husband of 52 years. I'm the author of The JOYful Table cookbook, A JOYful Christmas, The JOYful Table 5-week Meal Plan and The Paleo Bread Cookbook.
read more >
Available Books
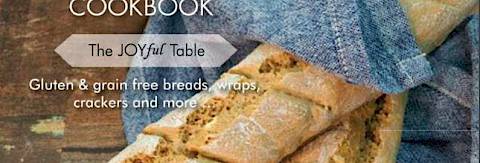
The Paleo Bread Cookbook- The JOYful Table - Hardcover

The Paleo Bread Cookbook- The JOYful Table - Softcover

The Paleo Bread Cookbook- The JOYful Table - Ebook

The JOYful Table (Second Edition) - Softcover

The JOYful Table (Second Edition) - Ebook
The JOYful Table 5 Week Meal Plan - Ebook